A note to MacOS users:
On many Mac computers, PowerPoint will not save as an MP4 with audio. Here are the steps Mac users need to follow to save their poster presentations as an MP4.
- Do not use PowerPoint to record your voice
- Instead, use Quicktime player to make a screen recording. (See https://support.apple.com/en-us/HT208721)
- Use iMovie to convert the quicktime file to an MP4. (See https://www.youtube.com/watch?v=L4LhjpKlRAQ)
- Compress the MP4 file if the file is too big.
After following these steps, you may jump ahead to "Uploading a Video to YouTube".
- Open your single-slide PowerPoint presentation. Please make sure to proofread your slide and preview as a slideshow before continuing.
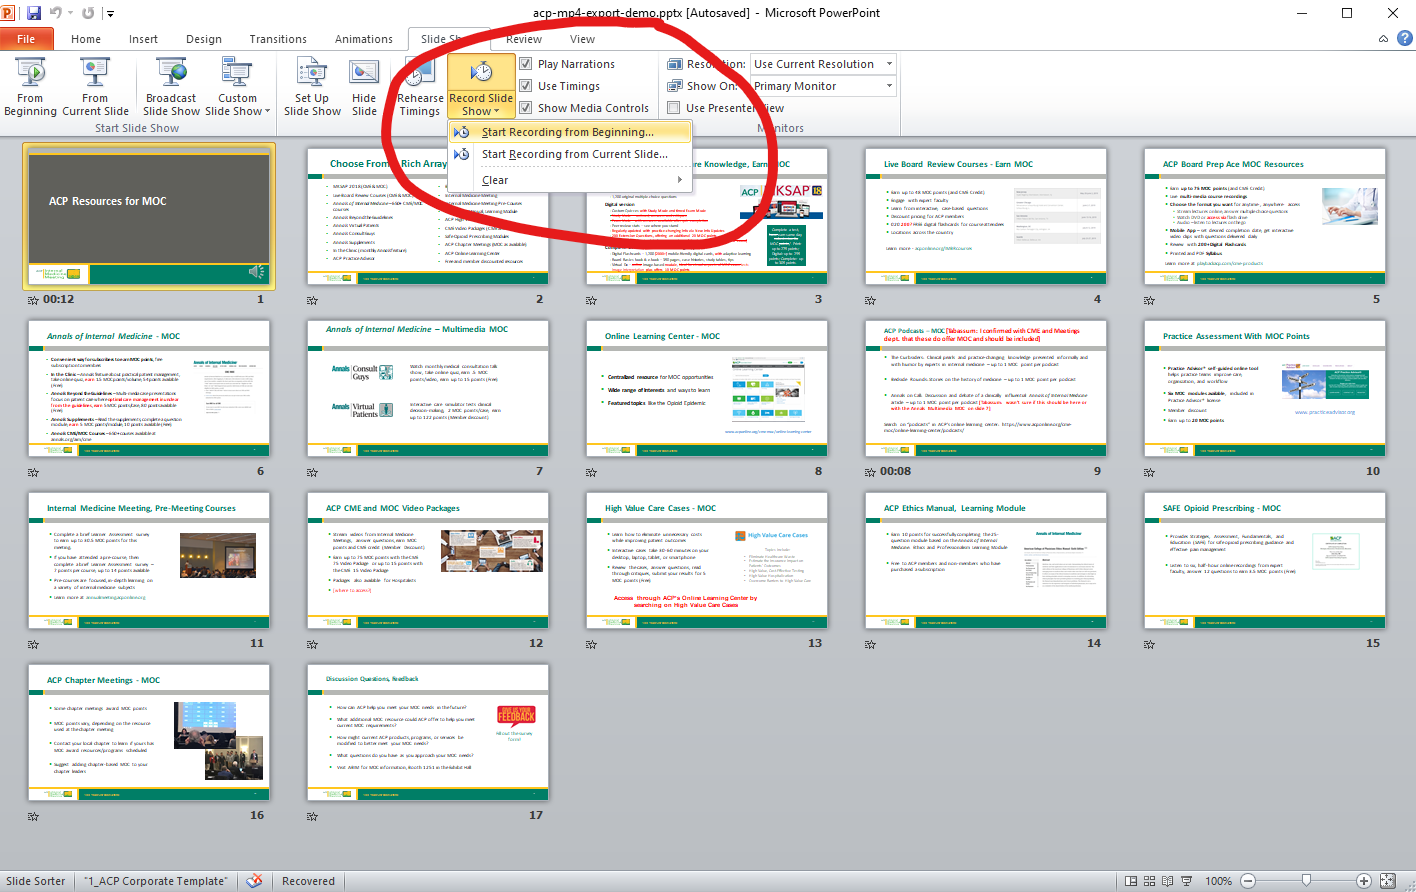
- Click the “Slide Show” tab, then click the down arrow on the “Record Slide Show” button and select “Start Recording from Beginning…”.
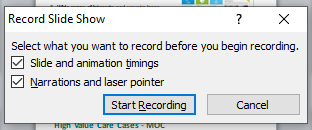
- Make sure both checkmarks are checked in the “Record Slide Show” pop-up, then click “Start Recording”.
- Your PowerPoint will open in presentation mode and will begin recording your audio narration. When you are finished narrating, click the “X” in the “Recording” pop-up.

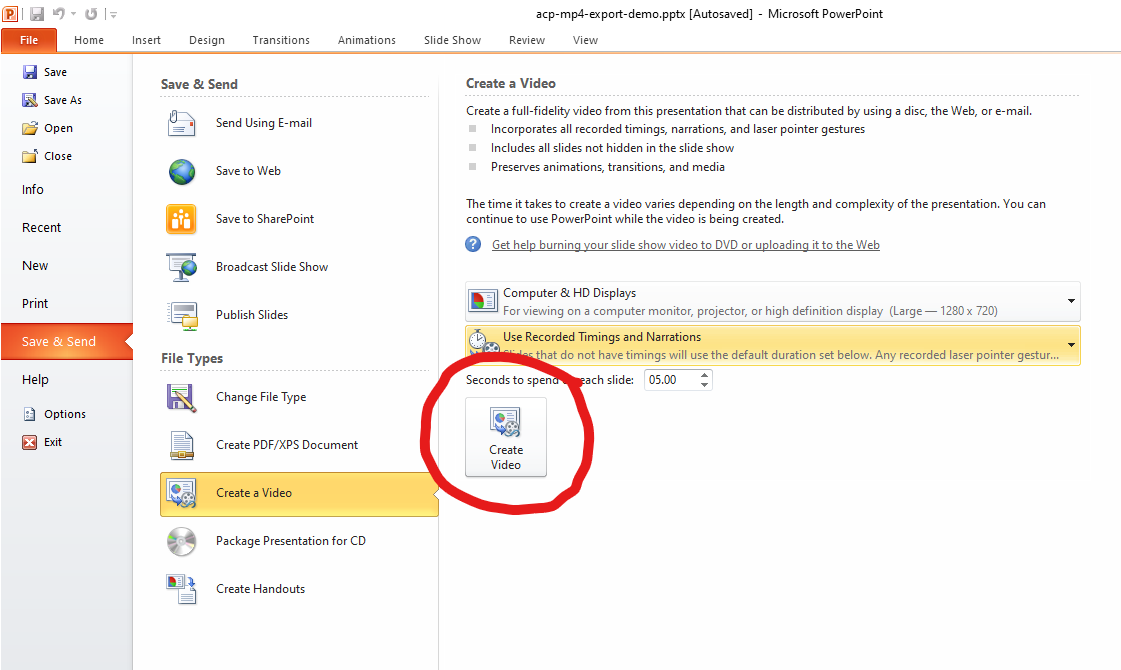
- Go to “File” > “Save & Send” > “Create a Video”, then click the “Create Video” button.
- In the “Save as type:” drop-down, if you have the option to select “MPEG-4 Video (*.mp4)”, do so and click Save. If you were able to generate and save the .mp4 file in this step, you can skip the section below labeled "Using Handbrake to Convert a .wmv File to .mp4" and go directly to "Uploading a Video to YouTube".
- If you do NOT have the option to select “MPEG-4 Video (*.mp4) for the “Save as type:”, you’re probably on an older version of PowerPoint. Instead, select “Windows Media Video (*.wmv)”.
Using HandBrake to Convert a .wmv File to .mp4
- Download the free, open-source video converter, HandBrake, https://handbrake.fr/.
- Install HandBrake as you would other software on your computer and launch it.
- Go to “File” > ”Open Source” and select your .wmv file.
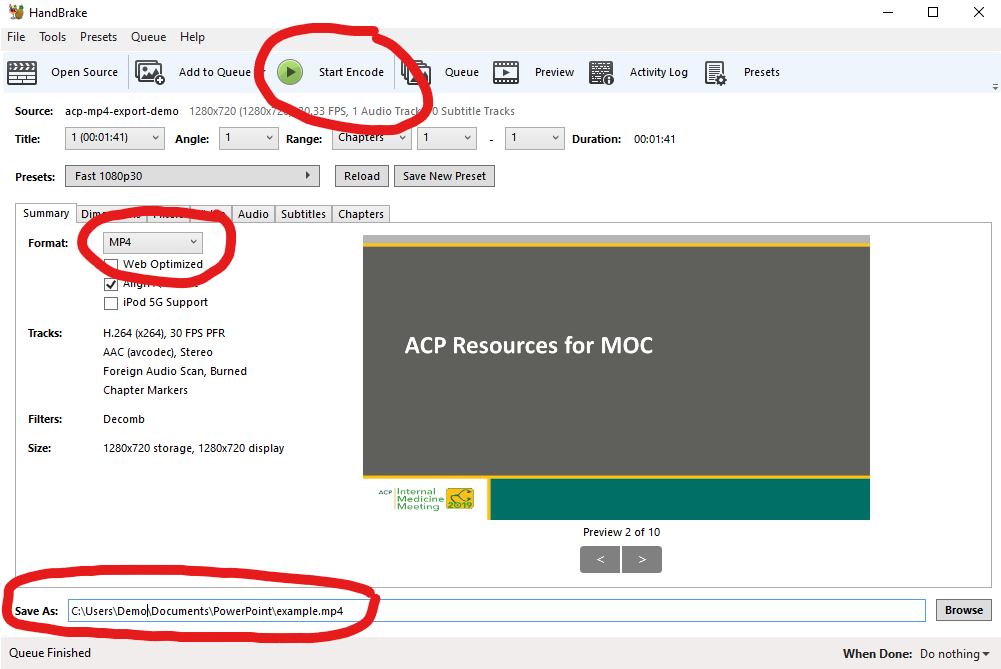
- On the “Summary” tab, make sure the “Format” shows “MP4”. You should not need to adjust any other defaults.
- Enter a file name for the converted file in the “Save As” box.
- Click “Start Encode”.
Uploading a Video to YouTube
While YouTube is not the only option for hosting a video online, it is the largest online video hosting service.
- Sign into YouTube using your Google username/password.
- Click on the “Create a video and more” icon in the top navigation, then click “Upload video”:

- If you have already set up a YouTube channel, you can skip to Step 6. Otherwise, you will be given the option to share videos under your real name or an online alias. Select the option that is most appropriate for you:
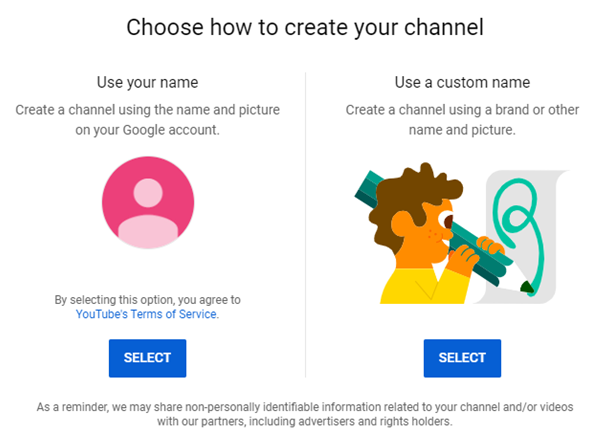
- You can safely skip most of the next page by selecting “SET UP LATER”.
- Now that you have a channel set up, click on “Create a video and more” and “Upload a video” once more.
- Drag and drop (or browse your computer and select by clicking “SELECT FILE”) your .MP4 video into your browser window:

- On the next page (Step 1 of 3), give your video a title and description. It will take a few minutes for your video to be processed by YouTube, but once it is you can select a thumbnail for the video. Skip the playlist option and select “No it’s not made for kids”. Then click “NEXT”.
- Click “NEXT” on Step 2 of 3 when prompted to add an end screen or cards.
- On Step 3 of 3, select either “Public” or “Unlisted”, depending on whether you want your video to be discoverable by the general public via search:
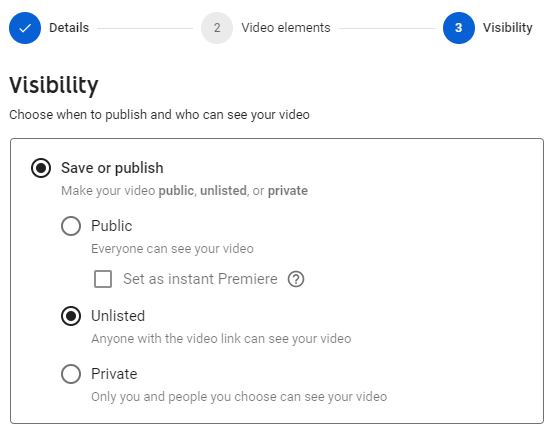
- Click “SAVE” to finish the upload process.
- The URL for your video should now appear on the screen. You can copy it to your clipboard by clicking the nearby “copy” icon:
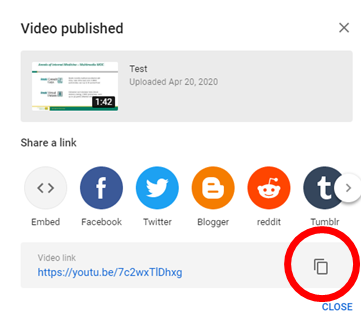
- Paste this link into the abstract submission form for your chapter.

